The Girls room.... Ok...so the girls room is really our son's room too..It is a shared room... :) Anyways...I have been working on it.. First, added some beadboard to 2 walls Second, painted the beadboard a pastel pink Third, paint over the stripes a solid cream Fourth, Outline with pencil over 200 polka dots... Fifth, Fill in polka dots with pink paint Sixth, Add the homemade initial letters ...still have to paint the baseboards, make a large canvas art and paper flowers, and some actual pictures taken with the camera NOT my phone. :) ~Fawn
Update:
I have now added our youngest next to the girls beds and have all three in a row. They did take longer to settle down tonight so we will see if it works out. We are trying to get our youngest to stop sneaking into his big sister's bed every night.
Showing posts with label Projects. Show all posts
Thursday, December 5, 2013
Thursday, February 3, 2011
Curtains


I love polka dot in red!!! So, I found some fabric on sale at JoAnn's the other day and was trying to figure out what to use it with. I know I wanted to use it for a ruffle on the rest of the dining chair slipcovers, but I don't have the drop cloth fabric for that yet. So, I saw our curtains and thought it would be perfect to add a little layer of polka dots!! I cut the fabric about 8 inches then hemmed the ends and the bottom hem then just attached it to the gingham ribbon above the cherry layer. I think it turned out adorable and adds a little customization to stock curtain panels in our dining room/kitchen.
Friday, January 28, 2011
A Quilt and Cupcakes...
Well, I have been up to a couple things....I made our new baby boy (soon to arrive in 18 days) a John Deere Quilt/Blanket. I had purchased the quilt front a couple months ago and the back fabric, but didn't buy any batting so needless to say it was quite some time ie. 2-3 months til I got back to the store to pick up some batting, which was perfect timing as it was on sale for 50% off :) So at nap time yesterday I quickly sewed the quilt together and it is now resting on the crib waiting to meet its owner... I also had just enough fabric to also sew a case for the changing table pad to match, which is actually going to be our boy's bed in our bed....a good friend of ours told us about using their changing table pad as a bed on their bed for the first couple months then move it into the crib and it was a MUCH easier transition....We love that idea as it has always been a battle with our kids when we move them from our bed to the crib...


Also, I found a recipe for Boston Cream Cupcakes from the Beat until Fluffy blog and since my hubby LOVES boston cream cake, thought this would be a nice treat! :)

MY VERSION is basically the same EXCEPT I did not make the filling, I just used a package of vanilla pudding and put in 2 cups of milk vs. 3 to make it thicker and used 1 1/2 teas. of vanilla extract. I also did not use superfine sugar in the batter and in the chocolate glaze I did use whole milk instead of heavy cream and agave syrup instead of corn syrup.
If you want her recipe just click on the Beat until Fluffy blog/recipe link above and it will direct you to her website recipe!!
~Fawn
Friday, January 21, 2011
Yummies...
Well, I found a new food blog yesterday...its called Beat Until Fluffy and OH MY GOODNESS are the recipes yummy looking...
Well, on the home page were two pumpkin recipes I had to try, one is called Harvest cake (a pumpkin coffee cake)

and Pumpkin Cookies.

I tried those and they turned out delicious!!!
So, I am now onto the homemade Pretzels (these are just coming out of the oven so no pics yet.) I just had to tell you to check out her blog, you will definently be inspired to bake and she has very easy to follow directions!:)
~Fawn
PS. I also made my own Vanilla Extract in October and it is now ready to use!! (I honestly have been using a few teaspoons out the past month) It was only Vodka and 6 vanilla beans (split open) and stuffed into the vodka, set on the counter in a dark spot for 3 months and now look at the color....and it is YUMMY!!!
Thursday, January 13, 2011
Getting Close...
Ok, so I haven't posted anything this year yet, so thought I would say a quick
not to what is going on...
1. Have 4 weeks left before baby #4 makes his appearance so am getting more and more uncomfortable by the day...
2. We have done some more on the upstairs bathroom, we have put some tiles on the stairs (the peel and stick variety)
3. ok...I guess that is it :)
We are back in the swing of school time (I currently homeschool our 1st grader and pre-schooler) so that is consuming alot of the time, when I have energy to work on the house...other than just trying to keep up with laundry and dishes and the cleaning :)
Hopefully, we will completely finsh the upstairs bath and get the shower dowstairs working before the 4 week deadline!! I am really hoping so!! Even have a good friend telling my hubby that he will help him install the kitchen cabinets...that sure would be nice to have that done too..but honestly I doubt that will happen :)
Well, hopefully in the next couple weeks I will have some finished pics of our bathrooms!!
Enjoy your January 2011!
~Fawn
Friday, December 31, 2010
Happy New Year and some Progress....
Well, I am finally getting a couple pics of the bathroom changes we have done...I don't have the best pics and we are still in the process of updating the bathroom but wanted to share a few things we have done in the past couple weeks...
Before:

These are the changes we have done!!
1. Painted stripes (wainscotting level) around the bathroom and a single strip on the top where it meets the ceiling.
2. Painted almost EVERYTHING that was oak (or fake oak) to a bright white
3. Painted all the walls and ceiling a cream color (it was pink, and 2 shades of green)
4. Installed new lighting above tub and sink
5. Installed new cabinet knobs (the cutest litle Starfish)
6. Hung our inspriation picture for our bathroom (Coastal theme)
7. Removed all the trim around the whole bathroom and in the process of priming/painting it.
8. Took down the various colored outlet/switch covers and put new decora white switches
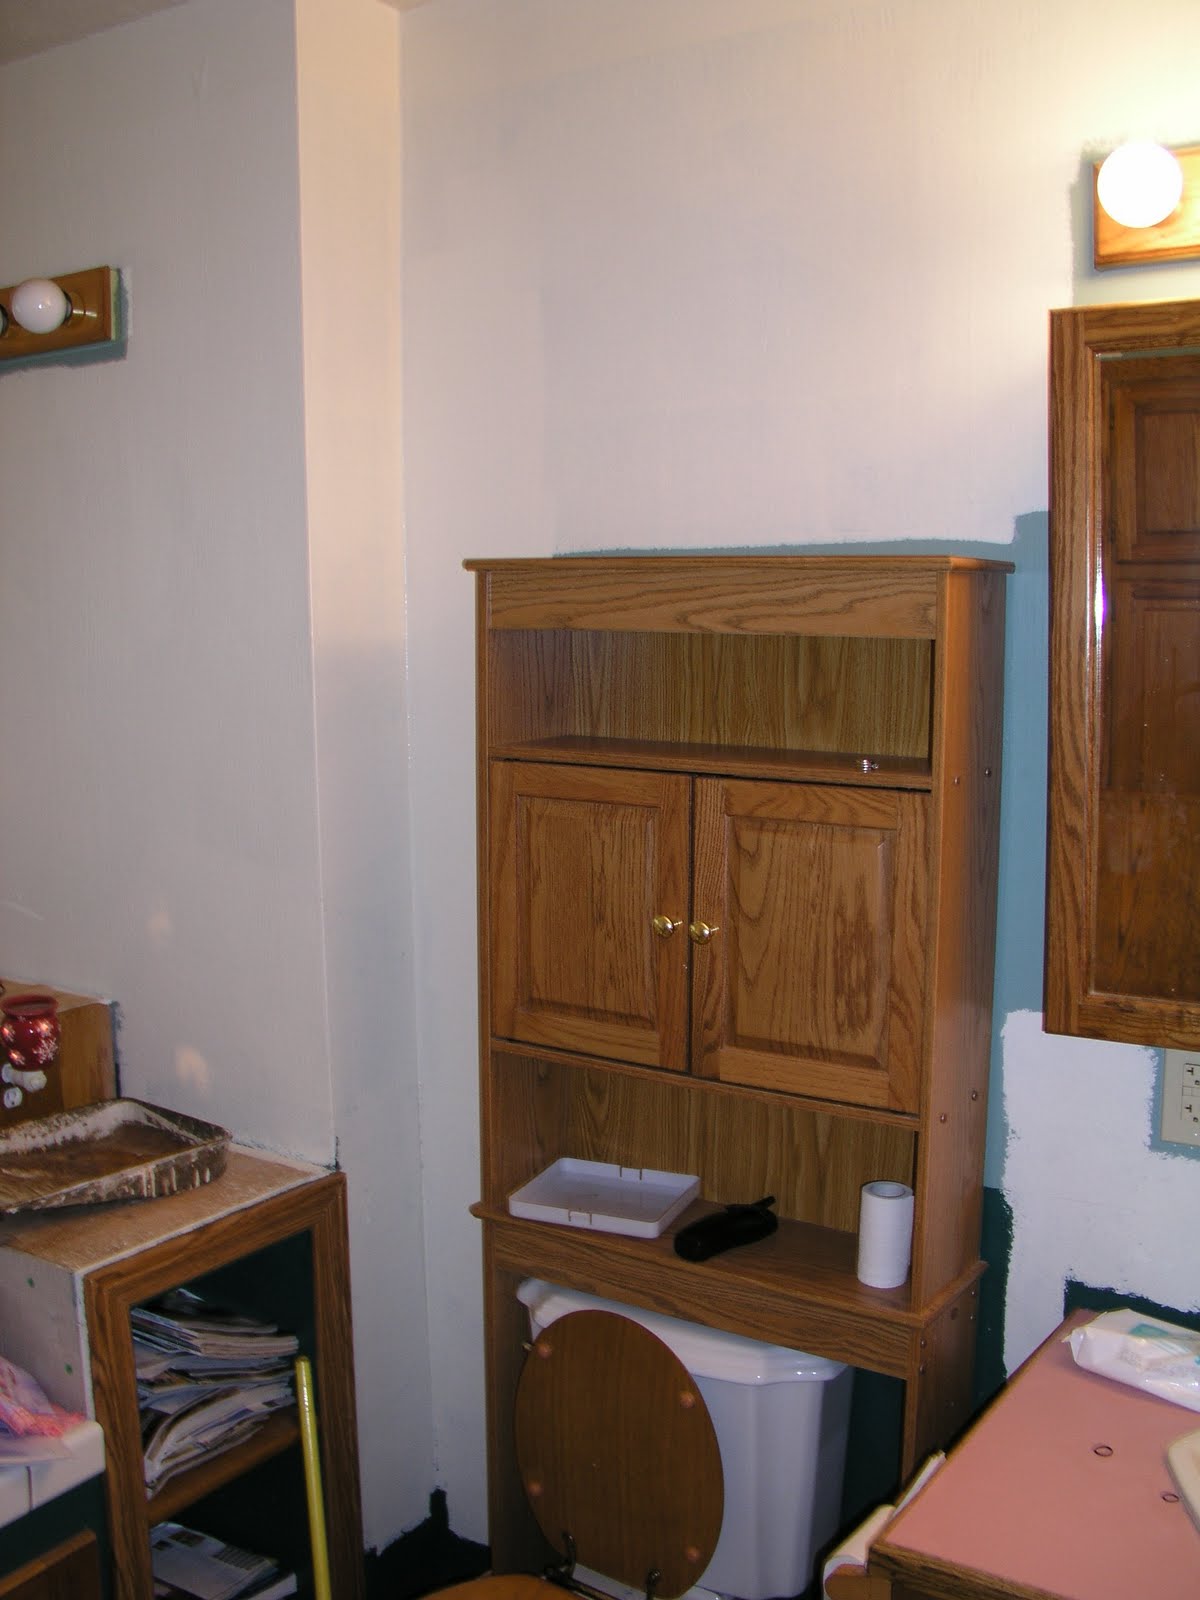
9. Hung Medicine cabinet (freshly painted white) and a storage cabinet above the toilet
Progress:


Note: There is 3 different types of TEXTURE on EACH WALL!! Where the border was is a smooth texture, right below that is a Horizontal linen/orange peel texture and about 1/3 up the wall to the floor is yet another texture (and it is more of an orange peel texture) It is REALLY weird to have that many textures but that is why we are doing the stripes to kinda of hide the fact we have sooo many textures...
What we have left to do:
We still need to finish the trim, do another coat on the stripes, put the shelf up next to the tub, hang up some art I bought in Hawaii, finish the stairs and beadboard that goes around the tub, put up some Uppercase Vinyl and finish painting in the magazine storage cubby next to the toilet and install NEW toilet....but we are making progress so that is all that matters right now :)
OH and here is the update on the craigslist mirror, that I redid:
1. Painted white with Bin Primer and then white paint and then another layer of Black paint and Rubbed edges to give an antique look
2. Put on Uppercase Living saying "Make yourself at HOME" the only thing is I think the E on the Home is going downhill, so I might buy another E and fix it, but so far no says anything until I point it out....but they could just being nice :)
BEFORE:

AFTER:

Well, Happy New Year to everyone and be safe!!
See you Next YEAR!!
~Fawn
Labels:
Before and After,
Projects
Tuesday, December 14, 2010
Kitchen Cabinets
Well, I am very happy to say we have bought our kitchen cabinets for our kitchen!!! When we bought the house we knew we would have to redo the kitchen as the cabinets were falling apart and had holes in weird not convenient locations... but I had been looking at craigslist off and on all year and watching to see if I could find a deal...I saw about a week or so ago some cabinets with an antique black finish, that I thought were pretty but way over my budget at $1900...well a week later they were marked down to $1000, still over our budget but I convinced my now laid off hubby to atleast take a look at them.. Well, we both liked them, they were older (10 year) oak cabinets that the seller had personally antiqued black and they looked cool. She was pretty firm at $800 and we had in our heads that we could ONLY pay $500 as we really didn't even have that...but she texted me back and decided yes she could take the $500!! So, YEAH we are going to get new kitchen cabinets!!!!!!!! (ok not new but new to us)

So, I am attaching the photo she had put on her ad from craigslist to give you an idea on what we they look like....it is going to most likely be a project for after the baby is born, but one can only hope by chance we will be able to do it before.... one can dream right :)
Please check them out and let me know what you think!!!! Also, what you recommend for a color of countertops....
~Fawn
Labels:
Projects
Saturday, December 4, 2010
Projects....
I haven't finished these projects yet, but I am going to show the BEFORE PICS then head downstairs to the family room and finally finish them up (in the next couple days)....I am using this posting as motivation.. :)
First is a 4 poster Pineapple Twin Bed I picked up on Craigslist in late September for $30..

Second is a mirror I also picked up the same day for $25.

Both were rather beat up and well loved, but I thought they atleast were actual wood and structurally sounds...
So, here is the before and hopefully in the next day or two I will get the after done and pics on so you can see what I did with them..... :)
~Fawn
Labels:
Projects
Wednesday, November 24, 2010
Oilcloth Dining Chair Slipcover
Well, I tried something I have never tried before...sewing with oilcloth (ie.vinyl with alittle bit of fabric on the back side of the vinyl).... and made another slipcover for our dining room chairs...
I had bought the red polka dot oilcloth for our old dining table and used it for awhile but it kept slipping on the table and the kids painted once on it and I couldn't get it off... so I had it sitting in the tablecloth bench for awhile and thought...I wonder if you can make this into a slipcover????
So, I gave it a try... It definently wasn't the easiest fabric to work with, but you know what it did work and I think looks rather cute.. I ended up using all the yard and a half I had for it to do the whole thing...
I think it will be easier to wash off when the kids get food on it then the dropcloth slipcovers and next time I will research a little more on what type of stitch I should use for sewing with oilcloth... the stitch I used have NO Idea what it is called but it was the one I used for the dropcloths and don't know how well it will hold up, I can see the white thread poking through already in a few spots...but atleast it is done and usable... :) It took me about 1-1/2 hrs to finish, that is start to cut to finish the knife edging...so think that is pretty good time wise..
Though it does make me think I should make more of them for the other chairs and who knows I might try and actually upholster the chairs instead of just doing slipcovers....

I only took the one photo and it was taken right after I finished and put it on the chair so it doesn't lay the flatest or have all the folds out, but atleast you get the idea.... :)
Oh, I did use the same pattern as with the dropcloths but I did add the top flap to give it more room, since oilcloth has NO give in it!!
Would love to hear your opinions on it.....and any suggestions...
~Fawn
UPDATE:
The seams are coming undone where the seat back and the seat meet....and I also discovered I did NOT use the right type of seam...I guess I was supposed to use a long running seam NOT a hemming seam :) The good thing is I do have some extra fabric in that area so I should be able to fix it and not have to redo it..... :)
Labels:
Projects
Thursday, May 13, 2010
JJ's Headboard and bathroom part 1
This is part of the bathroom after 1 coat of cream paint (the previous homeowner left us a 5 gallon bucket of this)......we still plan on
1. Change lights out
2. Remove the ugly oak toilet thing and put a white storage thing there
3. Sand and paint all trim a bright White
4. Finish tiling around the tub...

This is the BEFORE!!! Notice Pink Ceiling..Floral Wallpaper...Green and Dark Green Textured walls...hollywood lights....oak....oak and more oak...

This is JJ's Bed with the new headboard up and his full bed..We still have to put his bed on risers
so it will fill in the gap between the bed and headboard.....

He likes it :)
~Fawn
Labels:
Decorating,
DIY,
Projects
Wednesday, May 12, 2010
Kids Bedroom..Joy's bed....Take 2
Here is the AFTER of Joyelles side of the room with JJ's old twin bed that I put some watered down black latex paint over to darken it and make more chocolate brown...some pink Uppercase Living polka dots.....and some strawberry shortcake sheets with her PB quilt.....I am going to redo her canopy with a crown (found off etsy) with more polka dots and I have moved her name to the end of her bed.....

Another shot..you can see her old bed (toddler/crib that is now moved to Savannah) in
the background....

Here is the BEFORE!! ( this is before I rubbed on the black watered down black latex paint)

She loves it and that is what matters most!!!
I am also working on JJ's full bed...made half of the headboard today and hopefully will finish it tomorrow....
~Fawn
Labels:
Decorating,
DIY,
Projects
Sunday, May 9, 2010
Kitchen Part 2
Please note: This Kitchen is FAR from a show stopper.. It is just some minor fixing before I have to do a major kitchen remodel....mainly to make things atleast a little more presentable!! :)
This is the shelf.....with some things added..

This is the corner of the kitchen on one of my 3 different types of countertop (this being a sheet of lineolum) and some freshly baked cinnamon rolls cooling :)

A closer look at the stripe...

This is the shelf.....with some things added..

This is the corner of the kitchen on one of my 3 different types of countertop (this being a sheet of lineolum) and some freshly baked cinnamon rolls cooling :)

A closer look at the stripe...

Well, I finished up the stripe in the kitchen and then decided I need to stick up a shelf above the sink.... there was a shelf when we bought the house, BUT it wasn't actually attached so when my little boy reached up to grab a cup...it all came tumbling down....so needless to say I actually screwed this one to the wall and to the shelf!!!
No, it is not perfect, but neither am I so I think it is just right :)
~Fawn
PS. We are now also doing a minor remodel in the bathroom so I will update you on that too...bathroom half painted...exhaust fan ready for a facelift...and new lights picked out..
new vanity top and faucets picked out....nothing bought but all in the works.....
Labels:
Decorating,
DIY,
Projects
Subscribe to:
Posts (Atom)